Blog

Jiffy Corn Pudding Recipe
American
Preksha Sharma

Jiffy Corn Pudding Recipe

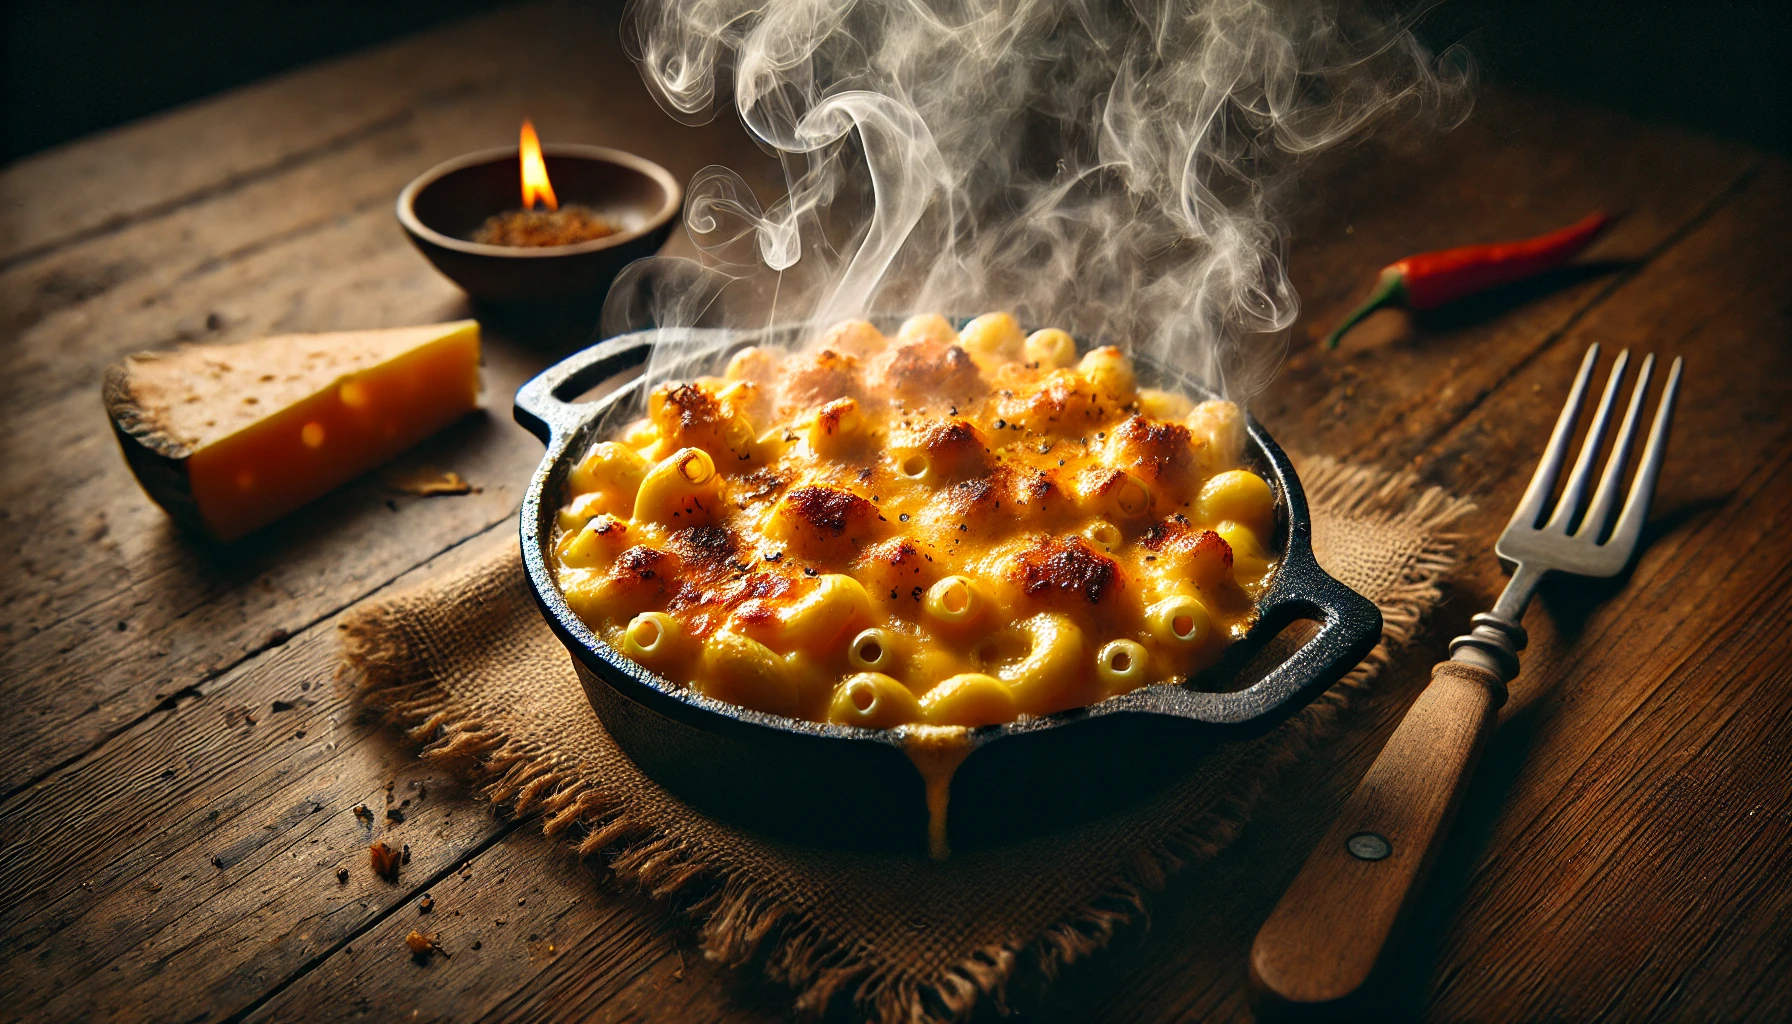
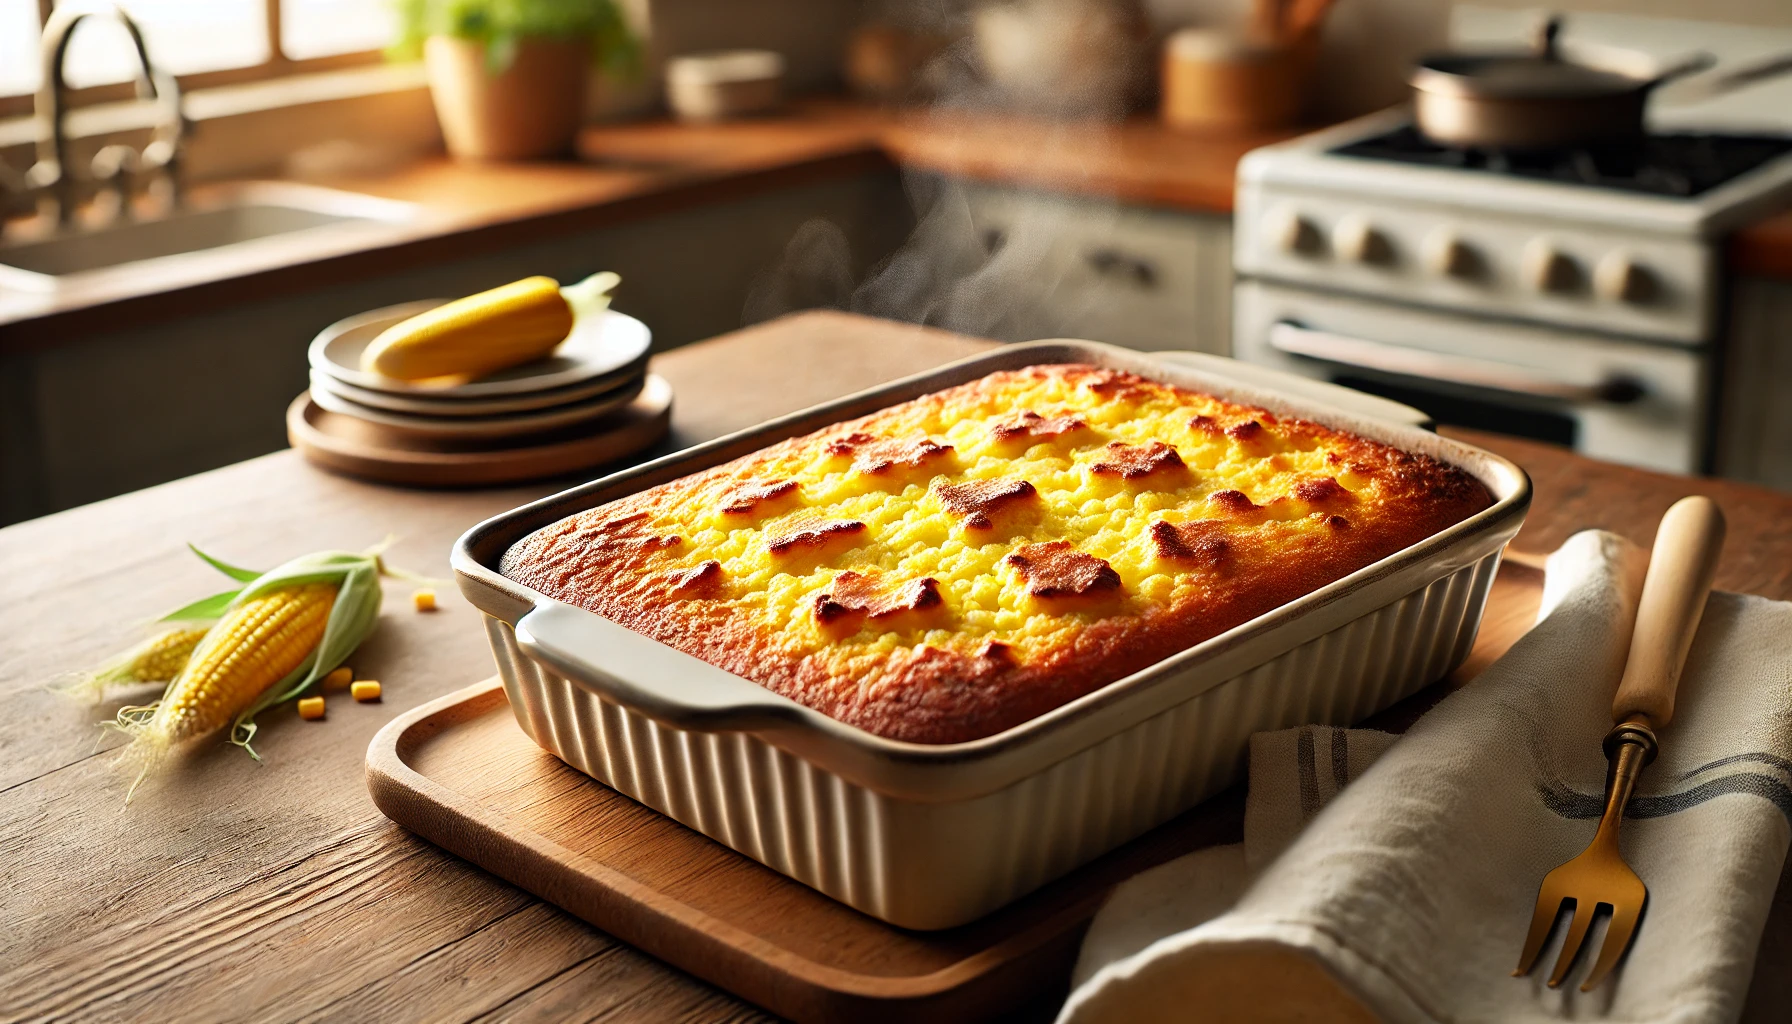
Ratings: (4.8/5 based on 450 reviews) Servings: 8 servings Preparation Time: 10 minutes Cooking Time: 45 minutes Total Time: 55 minutes Jiffy corn pudding, if you have had some before, is a delicious treat that just strikes a perfect balance between savory and sweet. It has a creamy texture and combines jiffy cornbread mix with whole corn and cream-style corn. The pro of this recipe is that it is easy to make, tastes absolutely divine, and fits into any occasion. You can whip up this bad boy at a holiday or even a feast or family gathering. This jiffy corn pudding recipe is a total crowd-pleaser. It is made with a golden top and a center which is creamy. Jiffy Corn Pudding Recipe – Backstory Origin – Corn Pudding is widely used in Southern and Native American recipes. It shares its origin to the Native American homes that used corn during the harvest season to make simple dishes such as puddings and porridges. Soon, Europeans started immigrating to America and learned and adapted to the cultural dishes. They used eggs, milk, and sugar to create even more complex dishes than the ones made before. Jiffy corn pudding recipe has evolved all these years and most eminently it can be seen in the Southern kitchens. In these parts of America, it became a beloved side dish that was served at family gatherings and during other holiday meals. In recent years, the jiffy corn pudding recipe has established itself as a comforting staple in the South and Midwest regions of America. Inspiration – Jiffy cornbread mix is easily available in most households and thus, the inspiration behind the jiffy corn pudding recipe lies in this convenience. Jiffy Mix was introduced in 1930 and became very famous instantly for how easy it was to use it. Given the fact that it was pretty affordable as well, many households began to buy it for its taste without compromising on quality. As we use the jiffy cornbread mix as a base for our pudding recipe, the whole thing will become way easier and combine classic flavors with a convenient approach. Popularity – Jiffy corn pudding recipe has become a seasonal favorite across all homes in America. It is mostly eaten during the holiday season starting with fall and ending during winter. The holidays where jiffy corn pudding recipes can be eaten are Thanksgiving and Christmas. That’s because the recipe makes a perfect company for roasted meats and vegetables along with other holiday classics. Over the years, the popularity of the jiffy corn pudding recipe has only increased and it has become a popular choice for potlucks and family gatherings. Ingredients Also read: Golden Harvest: The Perfect Gluten Free Pumpkin Bread Recipe Instructions Step 1: The OvenStart by preheating your oven at 350°F (175°C). In the meantime, grease a baking dish with butter or non stick spray. Step 2: The BatterTake a large mixing bowl and combine the jiffy corn muffin mix along with whole kernel corn and cream style corn. Also add sour cream, melted butter, eggs and sugar. Stir it all well until all the ingredients are mixed evenly. Step 3: TransferPour the entire batter into the baking dish and spread it out all evenly. Step 4: BakePlace the baking dish full of our batter in the preheated oven for 45-50 minutes until the top is golden and looks crispy. In order to check if it is fully done, insert a toothpick in the middle and it should come out clean. The pudding needs to be perfectly set but still a little moist in the center. Step 5: ServeLet the corn pudding off from the oven and let it cool for a few minutes before you serve them. The dish tastes really good when it is warm and can also be served along with meats or salads. Nutritional Value Per Serving Also read: Banana Pudding Recipe: A Homemade But Tasty Bowl Of Sweetness Creamy And Rich Corn Pudding Recipe

Read More
Smoked Mac and Cheese Recipe
Italian
Preksha Sharma

Smoked Mac and Cheese Recipe for Winters

Ratings: (4.9/5 based on 300 reviews) Servings: 6 Preparation Time: 20 minutes Cooking Time: 1 hour Total Time: 1 hour 20 minutes The smoked mac and cheese recipe takes everything that you adore about the creamy, cheesy classic and mixes it with a rich, smoky flavor that brings barbeque magic to your table. With this blend of smokiness, and mac and cheese, your ultimate comfort food turns into something extraordinary. This recipe is perfect for a summer cookout or even for a cozy winter meal for any occasion. This smoky delight will be a huge hit at your events. Smoked Mac and Cheese Recipe – Backstory Origin – The origin of macaroni and cheese can be traced back centuries across various continents. Although, Italy stands out among them all. The early recipes of pasta with a cheesy sauce can be found in Italian cookbooks from the 13th century although it was not until the 18th century that we saw mac and cheese gain popularity in Europe and North America. As for the United States, it is often said that Thomas Jefferson was the one who popularized mac and cheese after tasting it in Europe. He used to serve it at White House dinners. Soon over time, the pasta dish evolved into the comfort food that we know today. Inspiration – Smoked mac and cheese is inspired by the intersection of classic comfort food and the barbeque culture. We know how smoking is often used to enhance the flavor of meats but when we do the same to creamy dishes such as mac and cheese, it creates an unexpected twist. This recipe adds a smoky depth to the traditional cheese sauce and takes it to a whole new level. It is perfect for the taste palette of both, cheese lovers and BBQ fans alike. This recipe is also suitable for vegans and vegetarians who would usually crave a smoky-flavoured dish the likes of meat or chicken. It could be served as a star on the dinner table or even a side dish. Popularity – The smoked mac and cheese recipe has come in handy during festivals or in BBQ restaurants where diners are looking for unique and elevated comfort food. There are more people now who are experimenting with smokers at home and smoked mac and cheese brings a level of sophistication to casual gatherings. It has a very unique flavour profile thus appealing to a wide range of palettes. It is no surprise that with its creamy texture and smoky aromas while also containing molten cheese, smoked mac and cheese steals the show. Ingredients For the Mac and Cheese: For Smoking: Also read: Creamy Cajun Chicken Pasta: 1 Cheesy Meaty Italian Bowl Of Happiness Instructions Step 1: Cook the MacaroniTake a large pot and fill it with a little salt and enough water for your macaroni. Add the elbow macaroni and cook it until it is al dente as per the timing and instructions given on the packaging. After it is done, drain the water and set the macaroni aside. Step 2: The Cheese SauceTake a large sauce and melt butter over medium heat. Add flour to the same and whisk continuously to avoid burning. As soon as the flour forms a roux, slowly pour in the milk and heavy cream. Continuously whisk the mixture until it is smooth and begins to thicken after about 5 minutes. Step 3: Add the cheesesNow reduce the heat to low and add the cheddar, gouda, mozzarella cheese, and parmesan. Stir it all continuously until the cheese melts and mixes. Season the sauce with salt and pepper as or taste. After it is done and thick, remove from heat. Step 4: Combine macaroni and sauceAdd the cooked macaroni to the cheese sauce and stir until the entire batch of pasta is coated in the sauce. Now transfer the mixture to a cast iron skillet or you can also use an oven-safe baking dish. Step 5: Prepare the smoker or grillNow preheat your smoker or grill to 225°F (105°C). To create smoke, place the soaked woodchips in the smoker box or place them directly on the coals if you are using a charcoal grill to create smoke. Step 6: Smoke the mac and cheesePlace the skillet or baking dish with mac and cheese onto the smoker or the grill. Close the grill and let it smoke for about an hour which will allow the cheese sauce to absorb the smoky flavour. Step 7: Add toppings (optional)To give your mac and cheese an extra crunch, you can add bread crumbs to the dish during the last 10-15 minutes of smoking. This will give the dish a golden crispy finish. Step 8: Serve and EnjoyRemove the smoked mac and cheese carefully from the smoker and let it rest for a few minutes. You can serve it all hot and garnish with extra cheese if needed. Nutritional Value Per Serving Also read: Cheeseburger Pasta: A One-Pot Delight for Easy, Comforting Dinners Healthy Pasta Sauce: 1 Of The Best Creamy Wonders

Read More
Smoked Turkey Wings Recipe
Cuisine
Preksha Sharma

Smoked Turkey Wings Recipe

Ratings: (4.8/5 based on 150 reviews) Servings: 4 Preparation Time: 15 minutes Cooking Time: 2 hours Total Time: 2 hours 15 minutes Smoked turkey wings recipe is a mouthwatering treat that is perfect for gatherings or game days or even to have a delicious twist on your favourite comfort food. If you are a fan of barbeque, these wings, with their rich, smoky flavour and juicy, tender meat, will satisfy your cravings. We are going to season them with a blend of spices that will be put to slow cook on the grill to get that perfection infused with wood-smoked goodness that your taste buds will adore. Smoked turkey wings work both ways, either you are a barbeque enthusiast or want to serve something special, this recipe will work wonders. Smoked Turkey Wings Recipe – A Backstory Origin – Smoked turkey is truly a delicacy whose origins lie in the American culture of barbequing. Turkey has been popular in various countries across the globe but it is especially popular in North America because of how it is linked to the Thanksgiving holiday. As for the part where we smoke the meat, this tradition could be traced back to the traditions of Native Americans where they used the method of smoking in order to preserve food. In the southern regions, smoking meat became an important part of the barbeque culture and hereby, turkey was brought in as an alternative to meats such as pork or beef. Inspiration – The smoked turkey wings recipe is inspired by the traditional techniques of barbeque where when we slow cook the meat, it brings out the best of flavours. Turkey wings are often underutilized and thus, are a fantastic choice for smoking as they are known for absorbing the flavours well and thus become incredibly tender. Smoked turkey wings are a healthier alternative to deep fried wings while also delivering bold taste and satisfying textures. Popularity – The popularity of smoked turkey wings have risen in recent times where it has become a popular choice for the barbeque enthusiasts while also serving the needs of casual cooks at the same time. The recipe serves as an alternative to fried wings or even smoked meats as it has the same rich, smoky flavour while also maintaining lower fat content. Chefs are always looking to diversify their BBQ menus and thus, the smoked turkey wings have received a devoted following at various barbeque joints as well as food festivals and even on social media. Also, people are always looking for healthier alternatives to red meat and thus, the turkey wings steal the spot. Ingredients For the Turkey Wings: For the Dry Rub: For Smoking: Also read: The Ultimate Smoked Turkey Breast Recipe for Juicy, Flavorful Goodness Instructions Step 1: Prepare the Turkey WingsFirst things first, you need to pat the turkey wings down with paper towels so as to remove the moisture. Then rub olive oil on each of the wings to help the seasoning stick to the meat and later get a golden brown texture. Step 2: Make the dry rubTake a small bowl where you mix all the seasonings together. Add your smoked paprika, garlic powder, onion powder, black pepper, salt, cayenne pepper, and brown sugar. This spice mix will give the wings a smoky flavor while also maintaining a hint of sweetness. Step 3: Season the turkey wingsBe generous while rubbing the spice mix on the turkey wings. Don’t hesitate to make a new bowl of seasonings if the ones you are using are over. Make sure that the turkey wings are well coated on each side. Now sit on the couch, and watch TV as your wings need to rest for 30 minutes to allow the flavours to soak in. Step 4: Prepare the Smoker or GrillGet your smoker or grill to preheat at 250°F (120°C). Now place the soaked wood chips in the smoker box or if you are using a charcoal grill, place them directly on the coals to create that smoky flavor. Step 5: Smoke the Turkey WingsNow place the seasoned wings on the smoker or on the grill grates while making sure that they are spaced out. This will allow the smoke to circulate around the grill and maintain an even texture on the meat. Close the lid and let the turkey wings smoke for 2 hours approximately or till they reach an internal temperature of 165°F (74°C) and are tender. Step 6: Rest and ServeAfter making sure that they are done, remove the turkey wings from the smoker and let them rest for 5-10 minutes as it allows the juices to settle. Serve them all hot and enjoy their juicy, smoky flavor. Nutritional Value Per Serving Also read: Perfect Smoked Turkey Leg Recipe: A Flavorful Feast with Every Bite! The Ultimate Smoked Pulled Ham Recipe: Tender, Juicy, and Full of Flavour

Read More
Smoked Turkey Breast Recipe
Cuisine
Anupama Mishra

The Ultimate Smoked Turkey Breast Recipe for Juicy, Flavorful Goodness

Rating: 4.8/5  Preparation Time: 30 minutes (Prep) + 3 hours (Smoking)  Are you prepared for the next level of turkey hunting? Smoked turkey breast is ideal for preparation for a festive meal, outdoor grill, or football game on Sunday. It will make your chicken tender, juicy, and full of flavor – your folks will be begging for seconds. A detailed guide on how to smoke a turkey breast is the next show with all the ingredients, nutritional values, as well as history to blow your guests. The History Of Smoked Turkey Breast Smoking meat is one of the oldest cooking techniques, and here’s why: Read more: The Ultimate Smoked Pulled Ham Recipe: Tender, Juicy, and Full of Flavour Ingredients for Smoked Turkey Breast Recipe To get that smoky, flavorful turkey breast, you’ll need the following ingredients: Pro Tip: If possible, brine the turkey breast for 4-6 hours before smoking. A brine solution made from 1/4 cup of salt and a gallon of water can enhance juiciness. Step-by-Step Instructions for Smoked Turkey Breast Follow these simple steps to achieve the perfect smoked turkey breast: Step 1: Prepare the Turkey Breast Step 2: Preheat the Smoker Step 3: Start Smoking the Turkey Step 4: Baste Periodically Step 5: Cook to Perfection Step 6: Serve and Enjoy Nutritional Information (per 4 oz. serving)  This smoked turkey breast is high in protein and low in carbs, making it an excellent choice for those following a low-carb or keto diet. Tips for the Perfect Smoked Turkey Breast Roasting her a turkey breast is time-consuming but it is one activity I do not mind doing as the outcome is worth every time spent. That being said, this smoked turkey breast is for the novice smoker and the experienced professional. The peculiarity of a deep smoky taste combined with the juiciness of the meat make it an ideal centerpiece for any meal. Check out this smoker-friendly crisp, succulent, and ready-to-serve to your guests. Read more:

Read More
Pineapple Cocktail
Cuisine
Anupama Mishra

Tropical Bliss in a Glass: The Ultimate Pineapple Cocktail Recipe

Pineapple Cocktail Rating: 4.9/5  (150 Reviews)  Preparation Time: 10 minutes If you fancy an alcoholic drink that will give you that exotic feel the pineapple cocktail is the drink for you! Pineapple sorbet mixed with the taste of rum and the amazing tropical flavor perfectly combines to make endless hours of cocktail enjoyment. Below, we want to invite you to an interesting, simple pineapple cocktail recipe that you can make on any day of the week. A Tale of a Pineapple Cocktail Read more: Creamy Espresso Martini Recipe: 1 Of The Best Cocktails You Can Prepare Ingredients for the Perfect Pineapple Cocktail Step-by-Step Pineapple Cocktail Recipe Step 1: Chill Your Glasses  To add extra chill to your drink, its recommend that the cocktail glasses are put in the freezer for roughly 10 minutes before preparation. This will ensure that your pineapple cocktail is as cold as can be to give your clientele that perfect feeling.  Step 2: Mix the Ingredients  Pour the pineapple juice, rum, coconut cream and lime juice and shake in a cocktail shaker. If you would like a slightly sweeter drink, pour in the sugar or simple syrup. Agitate the bottle for about 20-30seconds. Step 3: Add Ice  Pour ice into the cocktail shaker and shake it for one more 10-15 seconds. It also allows chilling of the cocktail and mixing all the ingredients of the cocktail perfectly. Step 4: Pour and Serve  Now you can pour equal quantities of the mixture into your chilled glasses into which you have added ice cubes. Step 5: Garnish Like a Pro  Add a slice of pineapple and a sprig of mint before serving your cocktail, to ensure every beverage looks good enough for the glossy pages of a bar guide. You can even add a cute cocktail umbrella if you are feeling festive! Nutritional Value (Per Serving) Tips to Customize Your Pineapple Cocktail Why You’ll Love This Pineapple Cocktail FAQs  Q: Is it willing to use canned pineapple juice?  A: Yes! Using freshly squeezed pineapple juice will result in the best flavour ; however, the canned juice will suffice. Q: Is it possible to prepare this cocktail beforehand?  A: This mix can be prepared hours before the serving time and just before serving it can be refrigerated for not more than half an hour. It is best served shaking it with ice just before consumption is due. Everyone can have a vacation in the tropics if there is this entertaining rum pineapple cocktail in your glasses! Read similar posts:

Read More
cheeseburger pasta
Cuisine
Anupama Mishra

Cheeseburger Pasta: A One-Pot Delight for Easy, Comforting Dinners

Cheeseburger Pasta Recipe Rating: 4.8/5 Preparation Time: 30 minutes  Whenever that picture of a simple cheeseburger just tempts you but you really do not feel like grappling with the grease on a barbecue grill? Let cheeseburger pasta into the picture, a one-pot meal that is easy to prepare but packs the punch of the cheeseburger, pasta texture-wise. It’s perfect for those weeknights when you’re running low on time and will become a staple in your home for sure! Easy to prepare and requiring limited cleaning up, this simple cheese and beef casserole will be as enjoyable to prepare as a gourmet dish to consume. I hope you all enjoyed the previous recipes, Now let’s go for this easy cheesy cheeseburger pasta recipe. A Brief History of Cheeseburger Pasta Read more: Taco pasta recipe- a one-pot meal that you definitely need to try! Ingredients for Cheeseburger Pasta Recipe Step-by-Step: How to Make One-Pot Cheeseburger Pasta Step 1: Sauté the Beef and Onions Step 2: Add Garlic and Season Step 3: Add the Liquids and Pasta Step 4: Simmer to Perfection Step 5: Add Cheese and Serve Nutritional Value (per serving) Tips for Making the Perfect Cheeseburger Pasta This one-pot cheeseburger pasta is an ideal meal for any time of the week and especially when you haven’t planned what to cook or simply want a comfort food dinner. To add some decoration and make it more appetizing it can include tasty beef, ketchup, mustard and cheese as filling. Give it a try tonight and you could have your new favourite every time meal. Read similar posts:

Read More
Baby Back ribs. Easy & delicious
Cuisine
Anupama Mishra

Mouthwatering Baby Back Ribs Recipe: The Ultimate Guide to Smoked Baby Back Ribs

Ratings: 4.9/5 Preparation Time: 20 minutes  Cooking Time: 4 hours  Total Time: 4 hours 20 minutes  When it comes to a dish of baby back ribs there is nothing better than seeing them cooked to perfection. No matter whether you are going to have a family dinner or are planning a barbecue party at the backyard, the following recipe for the baby back ribs will make your guests wolf down their plates. The history of baby back ribs will be explored in this guide, along with how to cook the dish and nutrition information. If you follow these simple instructions you will be able to impress your family and friends with smoked baby back ribs! A Brief History of Baby Back Ribs Read more: Best Korean Braised Pork Ribs: Galbi Jjim Recipe Ingredients for Baby Back Ribs Recipe Steps to Make Perfect Smoked Baby Back Ribs Step 1: Preparation Step 2: Smoking the Ribs Step 3: Wrap and Finish Step 4: Serve Nutritional Value (Per Serving of Baby Back Ribs) Tips for Perfect Baby Back Ribs Creating perfect smoked baby back ribs may not be a very easy task, but with this specific recipe, you are sure to add it to your go-to list. The ribs are tender and juicy accompanied by a tasty and aromatic BBQ sauce, making the whole product irresistible. Who’s ready to jump into the world of BBQ grilling? If you want to learn about beginner smoker techniques or simply enjoy some delicious smoked baby back ribs in your backyard then please follow this guide. Bon appétit to all the family members and the friends! Read similar posts:

Read More

I’m Jessica, your new guide. Welcome to my Cookbook!

Lorem ipsum dolor sit amet, ad consectetur adi picibe elit, sed do eiusmod tempor inci didunt quo labore e dolore magna aliqua ut.

Workshop

Subscribe
Subscribe to our newsletter and be informed about new recipes & workshops.

Follow me on Social Media