Blog

Spider Cookies Recipe for Halloween
Specials
Preksha Sharma

Spider Cookies Recipe for Halloween!

Ratings: 4.8/5 from 130 reviews Servings: Makes about 20 cookies Preparation Time: 20 minutes Cooking Time: 12-15 minutes Total Time: 35 minutes These spider cookies are almost too spooky to eat but once you get them fresh out of the oven, trust us, you will want to sink your scary fangs into them for sure. If you are looking for something cute, but eerie, these adorable little spider cookies will strike the perfect balance for your aesthetic and cravings. Also, they will surely be a huge hit at your Halloween bash this year, or maybe just send your kids’ lunch to school. This spider cookies recipe will feel like a fancy arts and crafts project that you can eat. Also, it won’t truly be the Halloween spirit if you cannot turn something sweet and innocent like cookies into something that looks like they could crawl out of the plate any second. These spider cookies are perfect to make the kids and grown-ups scream – with the delight of course! Invention of Spider Cookies Recipe for Halloween Origin – The tradition of having themed baked goodies for Halloween can be traced back to how early European settlers used to celebrate Harvest festivals. They symbolized their abundance right before the winter months by using sweets as well as cakes and pastries to celebrate. However, the concept of making them scary and playful originated in the United States as soon as Halloween debuted as a child-focused holiday. Decorative baking gave rise to spider-themed treats because let’s face it, spiders are pretty scary. The whole thing fits perfectly for Halloween. Inspiration – Spider cookies are considered one of the playful elements of Halloween. It forces people to be creative with their designs and cookie projects making it a fun family activity to do during the holidays. The main goal is to twist the normal cookies so they look eerie but fun. The inspiration truly lies in the spooky essence of Halloween and how best we can portray our aesthetic. Popularity – I feel like social media has played a significant role in popularizing the spider cookies for us. You can find images of people making these on Instagram and Pinterest all the time. They are pretty easy to make and everyone loves them at Halloween parties thus making them a perfect snack for the holiday. On that note, we have also seen a variety of bakeries offering these cookies with options such as gluten-free, dairy-free as well as vegan options. Spider cookies can also be seen as a part of baking challenges. The main reason for its popularity lies not only in its visual appeal but also in the way that it engages people with the holiday spirit. Ingredients for Spider Cookies Recipe Also Read: Decadent And Crunchy Caramel Apple Cider Cookies Instructions Step 1: Preparing the DoughBefore you get on with dough preps, make sure to preheat your oven to 350°F (180°C) and also line two baking sheets with parchment paper. Now, add softened butter to a large bowl along with brown and granulated sugar. Crack the eggs as well as add vanilla extract. Cream them until the mixture is soft and fluffy. The best way to make sure it is done is by trying to make peaks and if they hold, your mixture is truly done. Step 2: Combine the dry ingredientsTake a second bowl and add flour, baking soda, and salt. Whisk them together until the mixture is uniform. Now, gradually start adding the dry mixture to the wet one making sure that you are mixing them at all times. Step 3: ShapeNow roll the dough into small balls about 1.5 inches in diameter and put them right onto the baking sheet. Make sure to leave enough space between two balls because as they bake, they will spread. Step 4: BakePut the tray back into your preheated oven for 12-15 minutes. Keep checking to see if the edges are lightly golden. Once done, take them out and place them on a sheet to cool down. Step 5: Add the Spider’s BodyAs the cookies are cooling down but still a bit warm, gently press a round chocolate such as a truffle into the center of each cookie to ensure that your spider has a body to it. Now let them rest and cool completely before the next step. Step 6: Add DecorationsMelt some chocolate and use it to attach mini chocolate chips as the eyes of the spider to its body. Now with a piping bag, make sure you have a very thin cut at the top, pipe 8 thin chocolate legs around each spider’s body. You can then put it in the fridge to cool down or let it sit at room temperature for a while. Nutrional Value (Per Serve) Also read: Strawberry Cheesecake Cookies Recipe: 1 Bowl Of Sweet Fruity and Cheesy Happiness Best Molasses Cookie Recipe: 1 Bowl Of Crispy Chewy Cookies

Read More
Halloween Cookies Spooky and Fun
Meals
Vaishnavi Sah

Halloween Cookies: Spooky and Fun

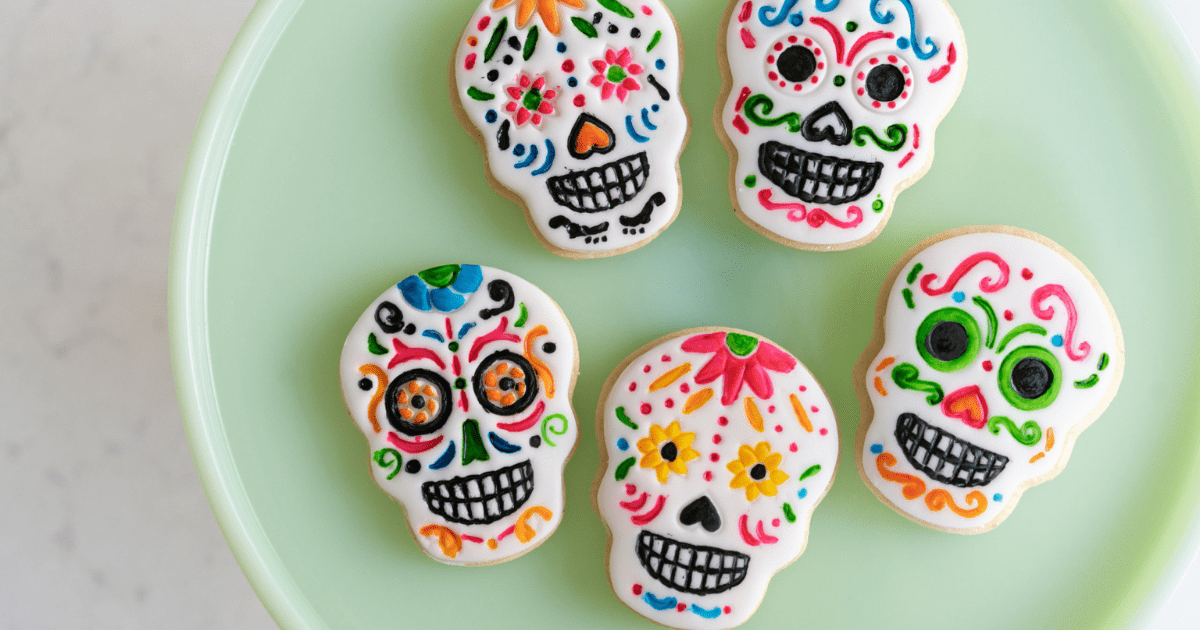
Halloween Cookies Rating: ⭐️⭐️⭐️⭐️⭐️ Prep Time: 10 minutesCook Time: 10-12 minutesTotal Time: 35-40 minutes Our favorite holiday is around the corner and all of us are super excited to compete with our neighbors for the best dressed and spookiest house on the block. But imagine making Halloween-themed cookies while your neighbors are just handing out bland treats for Halloween. Adding creativity to your cookies will be the cherry on top. Let’s make sure your treats steal the show this year! Make Your Halloween Cookies Stand Out This Year ●It’s all about bringing that creative twist to your Halloween cookies. While your neighbors stick to basic candy handouts, make these Halloween cookies to steal the spotlight, here is how you can make these cookies creative: ●Go to Walmart and get some savage cookie cutters shaped like ghosts, spiders, pumpkins, skulls, and whatever shape that fits your theme this year. ●Mix different edible colors and make icing out of that. This icing will help you make different designs on the top of the cookie such as creepy faces, a nun, or perhaps some more spiders. ●To make your cookies gory, add a surprise inside, to make the surprise, melt some red chocolate and add some edible blood color to it then fill the chocolate inside your cookies instead of normal boring black chocolate, and when someone takes a bite, it’ll look like blood is oozing out. READ MORE: “Coconut Rice Bliss: A Flavorful and Easy Recipe” Halloween Cookies Ingredients What is better than making skull cookies in Halloween? Let’s make them with a spooky twist. ●Peanut butter: 1/2 cup ●Brown sugar: 1/2 cup ●White sugar: 1/2 cup ●Eggs: 2 eggs ●Milk ●Vanilla extract: 2 tea spoon ●Flour: All-purpose ●Baking soda: 1teaspoon ●Chocolate candy(should be spherical): To make the cookies extra spooky. ●Chocolate frosting ●Icing gel (black or white) ●Shortening Halloween Cookies Recipe Step 1: ●Firstly, start by mixing the shortening, peanut butter, brown sugar, and white sugar until the mixture becomes soft and fluffy. Step 2: ●The second step is to crack an egg, whisk it with milk, and vanilla extract until well combined, and then add it to the big bowl. ●Take another big bowl and add the all-purpose flour with baking soda and salt. Step 3: ●Take this mixture and gradually add it to the peanut butter bowl and mix them well together until the mixture becomes a soft dough. ●Once the dough is ready, roll it into small balls (note: do this on a baking sheet to get smooth cut-outs of the skull). ●Flatten them with your hands and use your cookie cutter. ●Don’t make much specific details to the cookies as they will expand in the oven, so icing will be done after preheating the oven 375°F (190°C), ●Line your baking sheets with parchment paper. Step 4: ●Place your cookies in the oven for 10 to 12 minutes, until they turn golden brown. ●Take them out when golden brown and let them cool down. Step 5: ●Using the prepared chocolate frosting, attach two candy eyeballs to each chocolate candy piece. Then, use black or white icing gel to draw small lines for a mouth and small dots for nostrils on the skull’s face. To add some cracks or spider webs, you can use which makes your cookies ideal for Halloween! How to Make These Cookies Gory (Blood-Filled) The main aim here is to get the red filling ooze out when someone bites into the cookie (which will definitely freak them out). We can make the red filling in three ways: ●Melt red candy, or white chocolate and add some red edible food coloring to the chocolate. ●You can also add jam to make it look gooey and natural. The ultimate way to make the filling look real is by mixing corn syrup, red food coloring, and a touch of cocoa powder, it makes the filling more realistic and darker. ●After rolling the dough into balls and before baking, make an indent in the center of each cookie. ●And lastly, bake as usual Pairing Ideas: ●Pair these spooky cookies with some Halloween-themed drinks such as Bloody Mary. ●You can make creative and fun dips to eat with cookies such as a bloody red raspberry sauce or a spooky chocolate sauce. ●You can create a “Monster Mint Shake” with mint chocolate chip ice cream, milk, and green food coloring. Nutrient Value: ●Calories: 117 ●Fat: 6g ●Carbs: 14g ●Protein: 2g ●Sugars: 10g Get creative this Halloween by making these cookies, for more such recipes visit our website. Happy Halloween! READ MORE: Delicious Gorditas Recipe: How to Make This Mexican Delight at Home Savor the Flavor: A Delicious Black Bean and Rice Recipes You’ll Love!

Read More

I’m Jessica, your new guide. Welcome to my Cookbook!

Lorem ipsum dolor sit amet, ad consectetur adi picibe elit, sed do eiusmod tempor inci didunt quo labore e dolore magna aliqua ut.

Workshop

Subscribe
Subscribe to our newsletter and be informed about new recipes & workshops.

Follow me on Social Media