Arepas Recipe Rating: 4.8/5
Preparation Time: 30 minutes
Do you feel like munching on something crispy outside but soft, warm and fluffy inside? Look no further! For starters, Venezuelan and Colombian style corn cakes, known as arepas, are an impossible food to turn a blind eye to.
Below is the easy to follow recipe that will help you know how to make arepas for any meal. So now let’s take a closer look at their background, composition, and how they are prepared.
Background of the recipe
Before jumping into the recipe, let’s take a quick look at the history of these delightful corn cakes:
- Indigenous Roots: Arepas are believed to have been a form of staple food for indigenous tribes of what are today, Venezuela and Colombia for more than three thousand years.
- Cultural Significance: traditionally they are consumed in the morning as a breakfast bread however, the bread can also be eaten at midday or in the evening with the stuffing.
- Versatility: Overtime the ingredient composition of them has changed and depending on the region each will add their twist including different toppings.
Read more: Sweet Potato Chips Recipe: 1 Bowl Full Of Crispy Yellow Wonder
Ingredients for Perfect Arepas
To make the perfect arepas at home, you’ll need just a few simple ingredients that are easily accessible:
- 2 cups of precooked cornmeal (like P.A.N. brand)
- 1 ½ cups of warm water
- 1 tsp salt
- 2 tbsp vegetable oil or butter (for frying)
Optional Fillings:
- Cheese (Mozzarella, Queso Blanco, or any melty cheese)
- Avocado
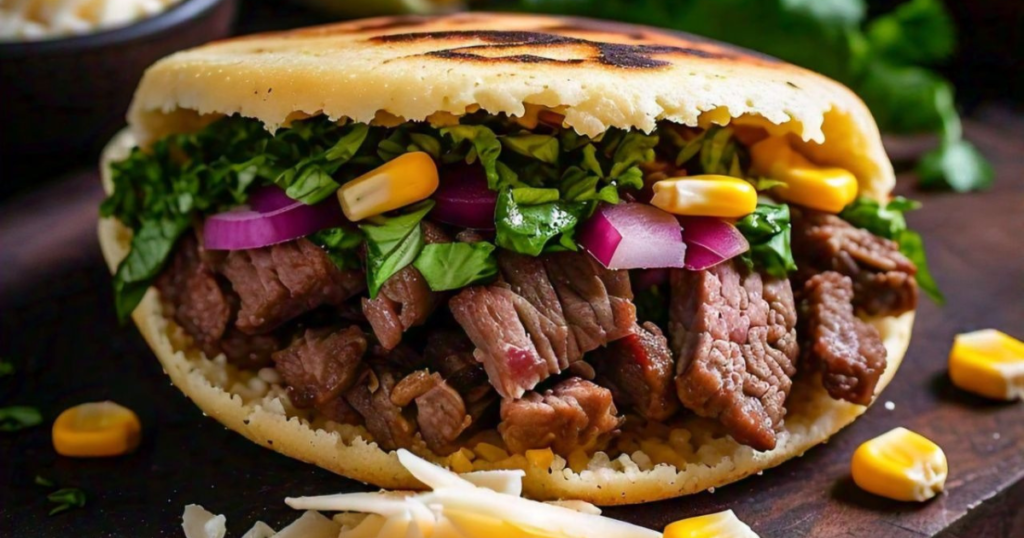
- Shredded chicken or beef
- Black beans

How to Make Arepas: Step-by-Step Guide
Step 1: Mix the Dough
In one medium sized bowl mix the warm water with salt. Gradually incorporate the precooked cornmeal into the mixture while stirring the concoction with your hands or a spoon. Continue mixing until t he dough is non sticky and free of lumps. After you have kneaded the dough let it rest for 5 minutes.
Step 2: Shape the Arepas
My advice is to divide the dough into 4-6 pieces. Afterward, each portion should be rolled into a ball, then flattened into a patty, approximately ½ an inch thick.
Step 3: Cook the Arepas
Add one tablespoon vegetable oil in non-sticky pan at medium flame. Spreading the flattened discs of dough over the pan, fry both sides for 5 – 7 minutes to gain a crisp brown colour. The interior should still be then tender as well as slightly doughy while the outside surface should be crispy.
Step 4 : Optional (Bake for Extra Crispiness )
If you want the outside crust to be much more crunchy, put the arepas on a baking sheet and bake in a hot oven at 175 degrees C for the additional ten minutes.
Step 5: Fill and Serve
After cooking, the arepas need to be allowed to cool a little. Cut them horizontally and use them like pocket sandwiches with your preferred fillings being cheese, Avocado or shredded meat.
Nutritional Value (Per Serving)
- Calories: 200
- Carbohydrates: 38g
- Protein: 5g
- Fat: 3g
- Fiber: 4g
They are naturally gluten-free, making them a great option for those with dietary restrictions. Depending on your fillings, you can also increase the protein and healthy fats to make them even more nutritious.
Tips for Making the Best Arepas
- Choose the Right Cornmeal: Remember to use cooked cornmeal which is meant for making arepas and may also be referred to as masarepa . That is why you have to use regular cornmeal, but it will not have the right texture.
- Avoid Overcooking: As much as possible do not over fry your arepas since they can become really hard. There must be a crispy crust but a soft inside.
- Experiment with Fillings: Don’t limit yourself! Use various forms such as eggs, pulled pork or ham as your fillings.
Arepas are more than a plate of food; arepas are a tradition and a necessity in the South America meals. Having learnt how to make arepas, may be it is time for you to try out this arepas recipe .
They are just perfect eaten without any additions, or packed with any preferred ingredients, you’d surely love having this recipe in your home. Please share your ideas and deviations from this theme of the classic recipe in the comments to this article!
Read similar posts:


